Showing posts with label crafts. Show all posts

Thursday, December 20, 2012

snowflakes

I got the below email from a parent last night:
When school resumes for Sandy Hook Elementary School in Newtown, CT; it will be in a new building.  The school district is preparing to reopen an older, empty school building to educate the students of Sandy Hook for the remainder of the year. The building is yet stark and undecorated, and here is where we can help.  Ways a classroom,  child or grandchild can help:  "We are asking your students to make and decorate a snowflake. We will hang them in the hallways at the stark, new building where the Sandy Hook students will be returning. PLEASE NO WORDS! We want just a cheerful, happy (glitter and sparkle) environment for the students entering the new building.    
Please pass on to any teachers you think may want to participate.
When you send your snowflakes, please include a note to tell us where they are from (your school, class, town, etc) to display along with your snowflakes.
Parent-volunteers are working to ensure that the students are welcomed back by a winter wonderland with the entire school decorated with as many unique snowflakes as possible. We encourage senders to be as creative as possible, remembering that no two snowflakes are alike. Here are some tips from Martha Stewart on making paper snowflakes.Please make and send snowflakes by January 12, 2013 to the Connecticut PTSA address below. 
Connecticut PTSA
60 Connolly Parkway
Building 12, Suite 103 
 Hamden, CT 06514 

I decided we needed to do this in class today! After learning from Jen how to make these awesome snowflakes, we got to work. I didn't talk to them about where they were going, I just said they're going to some kids that need an extra lift in their spirits and our beautiful snowflakes will do that. That was all they needed to hear and they cranked out close to 40 snowflakes!

I love the idea of this, so please make snowflakes and send them along. Who knows, maybe our snowflakes will hang next to each other!

Wednesday, September 19, 2012

crafty

Before the school year started I wanted to make something cute for my classroom. After looking in Pinterest, I was inspired by several things I saw. What I decided to do was cut up parts of books and Mod Podge them on a big letter E. It turned out awesome!
I pained the E white before doing anything else so it wouldn't look like it did with my frames.
After doing a lot of cutting I decided I wanted to make it only Harry Potter. Duh. So I made sure to cut out pieces from the first book that I loved, making sure each of the characters were represented. I also cut out a few chapter titles with their picture to break up the text.
 Finished product!

I have it hanging over the sink, and it looks pretty awesome, I'm not gonna lie.

Friday, August 10, 2012

upcycled frames

I moved classrooms this year and am in a gigantic brown, dull, and sad looking room. So I have been trying to add color and fun prints to liven things up. I also wanted to put up some framed pictures, but didn't want to use the plain black frames I had. So I decided to use those frames and make them look pretty and new.

With the first frame I decided to use the spray paint I bought for a totally failed craft. I used masking tape to make stripes. After that I took it outside and started spray painting.

I let it totally dry overnight and took the tape off. Total fail.
I didn't want to just give up yet, so I decided to take it back out and spray paint the entire thing. If it came out terribly, at least I tried since I wasn't going to use it the way it was.

I love that the first coat of paint bubbled and showed the stripes. A total accident, but I think it looks pretty cool!

The second frame I decided I would do something I had done before, but with fabric instead. A long time ago a friend taught me how to cover boring bracelets with strips of fun scrapbooking paper and Mod Podge. I did something similar with frames for my sisters bridal shower, and then again with ornaments last Christmas. (Annoyingly enough as I look back through my blog I didn't blog about any of these. Too bad because those Christmas ornaments were pretty awesome!)

Anyways. Here are all the supplies you will need for the fabric (or paper) covered frame.

I measured about how long the strips should be and cut up a bunch of strips. You want it to go around all of the parts you would see. If you are using paper, cut the strips a little bit thinner because they aren't as pliable as fabric.

Once you're ready you will start by putting some of the Mod Poge over the first part you will cover, including the back, cover with fabric, and then go over it again with more Mod Poge.

You continue this, overlapping the fabric as you go. When you get to the corner, the best way I found to cover it was to do a lot of overlapping instead of cutting the fabric to perfectly go around the corner. (That's the trickiest part of the whole process.) Once you're all done either lay it down on whatever you used as a floor cover, or hang it where it can dry easily.
I don't mind that the black frame is showing through the fabric, but it could have been avoided if I had known that would happen. If you use a light colored fabric like I did and DON"T want the frame to show through you could paint the frame white, go back and do a second layer of fabric, or just deal with it. If you use paper, this won't happen because the paper is thicker, even if it's white or light colored paper.

Now I just need to find a place to put my new frames!

Monday, July 23, 2012

glass cutting

I saw on Pinterest a way to cut glass to create drinking glasses, or other awesome things from wine bottles. While my dad was in town last weekend we tried it out.
All of the supplies, minus the nail polish remover.
So you wrap string around the bottle a few times and tie it. Once you do that you take the string off and you let it soak in nail polish remover for 10 seconds or so, and then put it back on the glass where you want it to be cut. Then you light it on fire! (I made dad do this. After my whole back fiasco, I didn't think luck was on my side and figured it would be better if the glass shattered all over my dad instead of me.) You turn the bottle around in circles until the fire totally goes out.
Once the fire goes out you put the glass in ice water. You don't need to use a tub, but we did because we weren't sure if the glass would totally shatter or not. 
The second it touched the water the top popped off! Dad and I both jumped not expecting it to happen so fast. We then sanded it down, and now it's ready to be a drinking glass!
We tried this on wine bottles, but no matter what we changed (the amount of times around the bottle, the amount of time soaking in nail polish remover) we couldn't get the top to separate from the bottle. BUMMER! I'm going to try it again though. The only thing I can think of is putting in more ice and making it colder? It wasn't as cold as when we started because we ran out of ice, so that's the only thing I can think of. I'll let you know if I'm successful in later attempts.

If you've done this before and had success on wine bottles, please tell me how you did it in the comments section!

Thursday, December 1, 2011

oh christmas tree

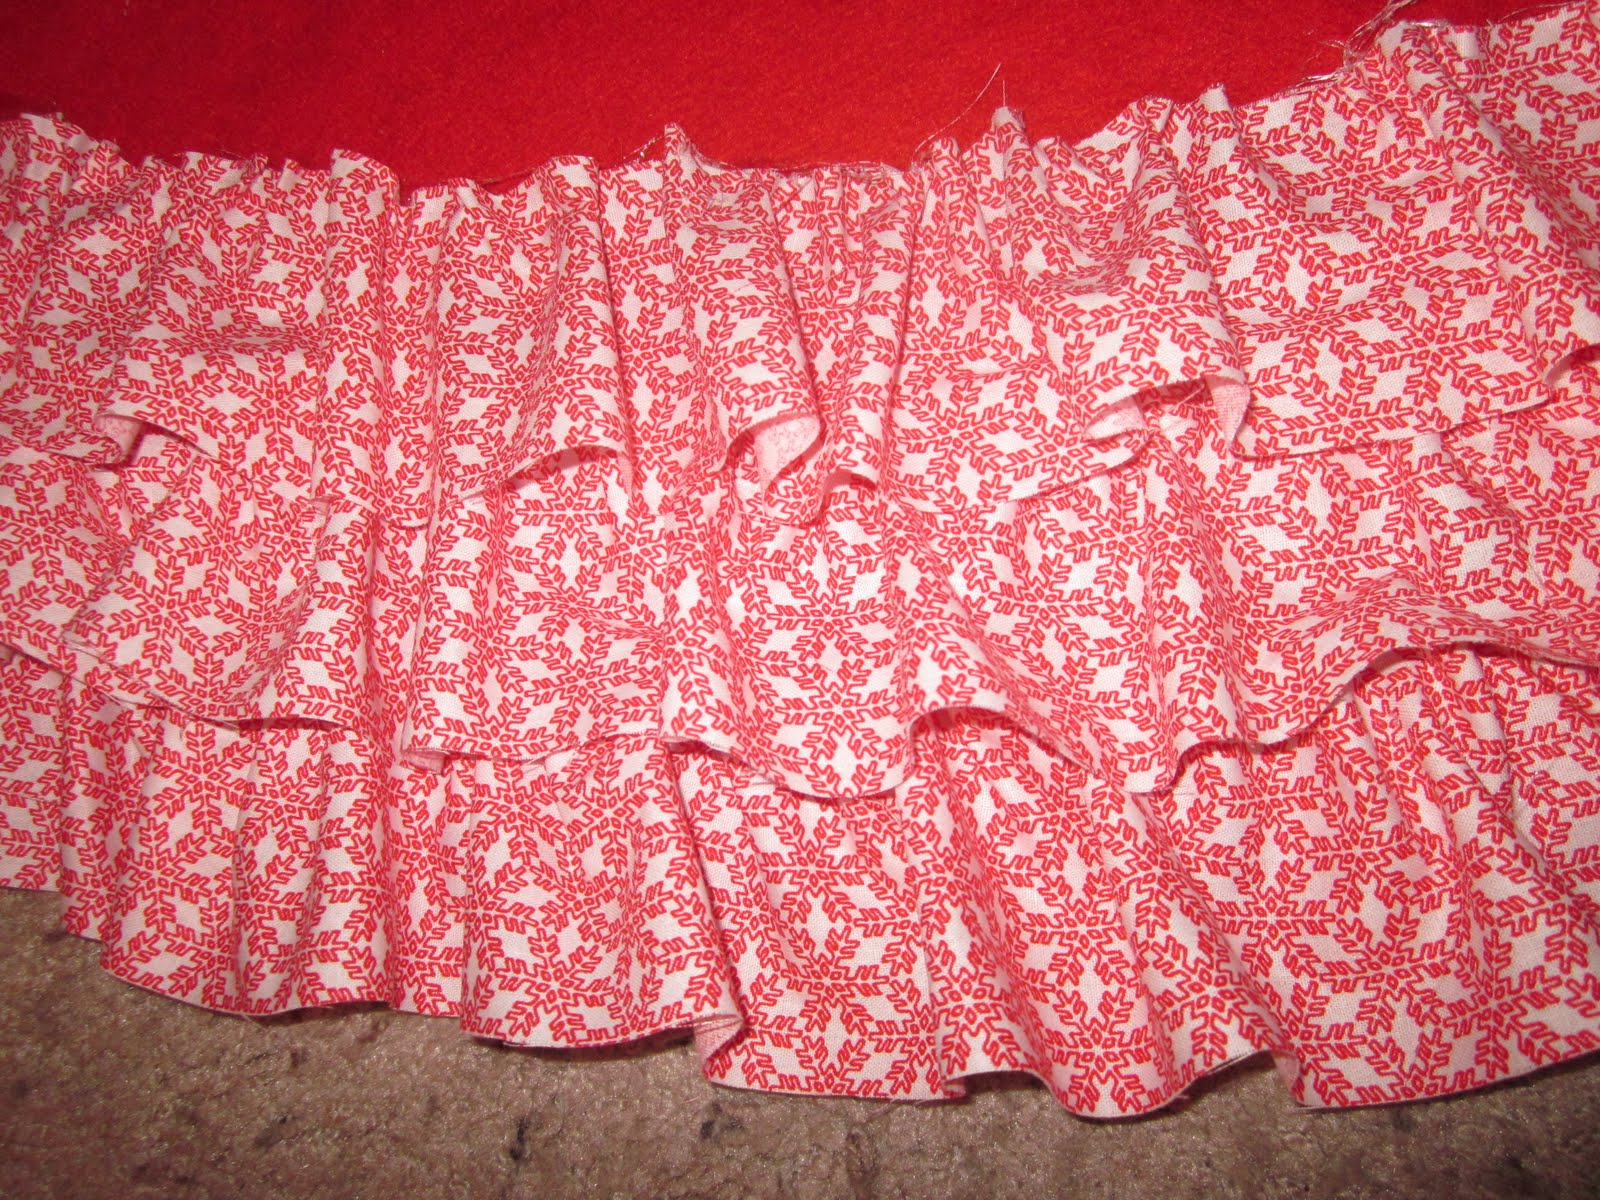
I have a tree skirt that does its purpose. It's red, felt, and ugly. Of course that meant I needed to look on Pinterest to find a craft I could do that would make this ugly tree skirt amazing. I found it and immediately got to work. Jo-Ann's had an amazing sale going on over Thanksgiving weekend so I got this cute red and white snowflake fabric for only $10 for 4 yards. (I used almost all of those 4 yards for those of you that will be copying....I mean for those of you that will be inspired by me.)

I cut the fabric into long strips, about 3 inches wide, until I had a big pile. It only took me about an hour, and that was with me stopping periodically to watch tv. After that I spread out my skirt and got all of my supplies ready to glue and ruffle the fabric.


Stupid hot glue gun glue dries quickly so for the first few strips I had to put only a little glue, ruffle, more glue, ruffle, you get the idea. I was video chatting with Rebecca and Miles during most of the gluing and she was very supportive. "So how long did the first circle take? Man this is going to take a long time. It's looking fluffy."


In the end it took me about 3 hours to do the entire skirt. The first few rows I was starting to get nervous that I would hate it. But it is AWESOME!! My fingers were covered in hot glue gun glue, a little burnt, and the floor was a mess with stringy glue stuff. When I picked it up to put around my Christmas tree it was glued to the ground! Luckily I was able to pull it off and nothing got messed up.

On a side note, as I was decorating my tree I pulled out a cat ornament my mom gave me in 2007. She even wrote Luna's name on the side so no one would forget who that cat was supposed to be. She even has wings and a halo. I think my mom is psychic and knew she would ran away/get lost/get killed by some wild Greenbelt animal. RIP Luna.

Merry Christmas y'all!

Monday, August 1, 2011

key holder

I don't know if I've said this yet, but I love Pinterest! I can't get enough! I don't know what I will do once school starts and I won't be able to pin things constantly. Maybe I can find ways to keep my students busy while I pin things. I probably wouldn't get in trouble right? Especially if I explain to my principal?

Anyways, I saw a cool thing where you use skeleton keys and make necklaces with them. So I went antiquing and found some awesome keys at this crazy store on Congress. I know I made fun of that guy I met at that one antique store, but I am officially in LOVE with skeleton keys. I think I will continue to buy them because they are just so cool! I'm not as crazy as him talking about the day of yore, but I do have a serious love for these keys now. After looking through pinterest more, thinking about other crafts I want to do I decided I also wanted to make some sort of hey holder to hang on the wall. When I saw this key holder (scroll to almost the end of her post), I started thinking about ways I could use the keys in a similar way instead of making necklaces with them.

Then it hit me, shadow box! So I went and bought more keys (I talked myself out of buying this amazing key that was $40), a shadow box, and got to work. My supplies:

Since some of the keys were dark, I was afraid some of them would not look as great with the black felt. So I got some of the fabric I had left over from another pinterest find, and used that to back the keys. I used sewing pins to hold everything down, including the fabric. After arranging the keys, all I had to do at that point was screw in the hooks and hang it!

Finished product.

I love my latest craft! Especially since this was the first craft I've made totally from my own idea (well...with some inspiration from others).

Sidenote: One of the blogs I read, Young House Love did a Pinterest challenge, and I happened to already be in the midst of this project when it was posted! Check out their blog for all the cool things their other readers have created.

Saturday, July 30, 2011

necklaces

As you know, this blog has turned into more of a crafting blog than a blog of what's going on in my life. Don't worry, once school starts I won't have time to craft since I'll be grading papers and returning emails all the time. Another awesome craft Angie and I found on Pinterest was making necklaces out of old t shirts. We followed the instructions on this awesome blog and got to work! 

All of my shirts


Done!


Angie had a pretty awesome crop top after her cutting. I think she said this would be her new workout shirt.

Here are all of the finished necklaces!

I tried doing one that was braided, and that just was a mess. Maybe I'll try again another time.

Thursday, July 28, 2011

wine charms

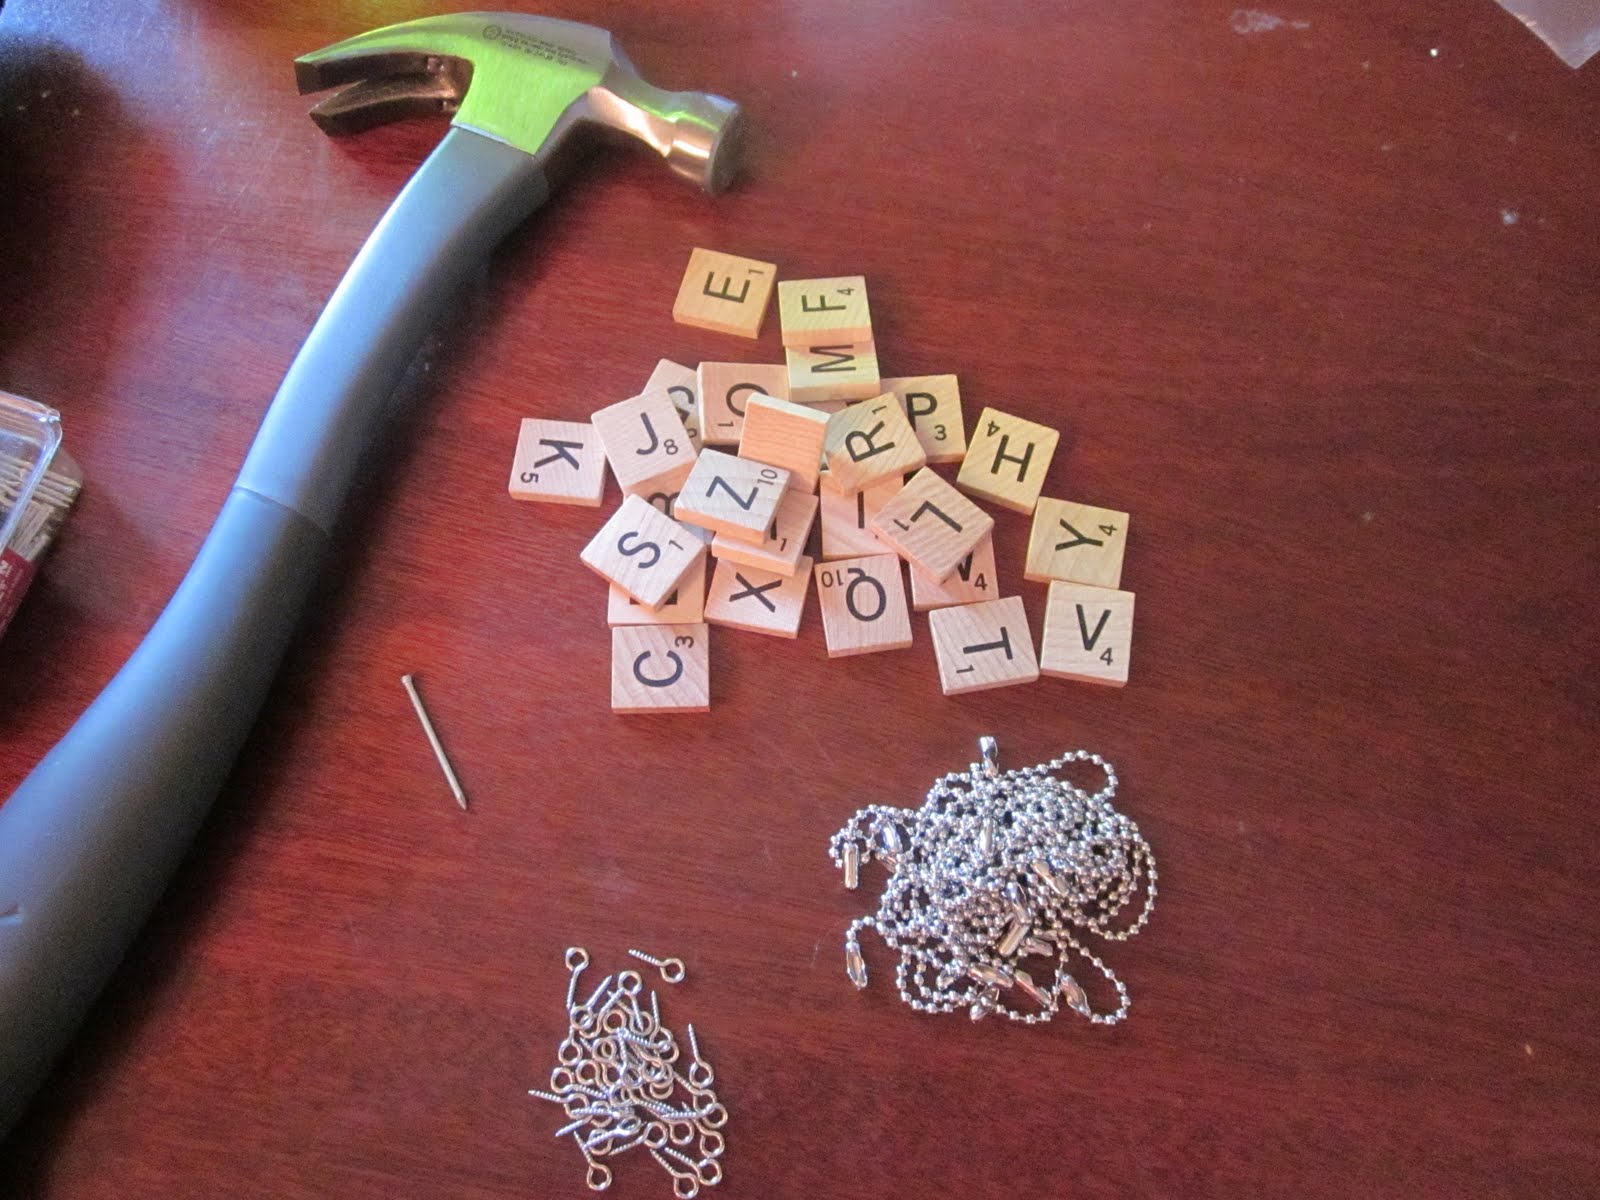
I have been wanting to make some sort of wine charms for quite some time. I found on Pinterest (I am OBSESSED) really cute scrabble piece wine charms. So I decided to make my own. I wrote on facebook looking for scrabble pieces thinking no one would have any, and one of the teachers at my school was about to give their Scrabble game away! YES!

After picking them up I got to work! Here were all of my supplies:

I used the hammer and nail to put a small hole in the top, and then screwed the tiny hook and eye (I think that's what they're called) in to the top. 


It's a lot trickier than you would think. See that crack there? I split about 20 pieces in half trying to get those freaking things in. Also my fingers were so sore afterwards screwing them in. After that, I hooked in a key chain ring, and voila! All Done!


I made a key chain for myself and Angie with the extras. I didn't see it on her key ring though...hmm...

Friday, July 15, 2011

antiquing

For one of my upcoming crafts I had to go to some antique shops looking for the correct materials. (You will have to wait and see!) One place I went to was insane! It was humongous, stuff was separated into different rooms and booths, and stuff was just crammed EVERYWHERE! I held my purse the entire time afraid I would knock something off a shelf and be forced to buy it. There were some interesting things I found. There were also a ton of different weird things and statues I really wanted to buy for Rebecca and Michael. I would have, but I didn't want to be derailed on my task at hand.

Cookie jar?

No idea. But $2.50 seems overpriced.

Sticks? Stirring implements?

I saw these in several different booths in a variety of colors. I think it's a noise maker, but I was too scared to test it out. I was afraid I'd have to buy it after that or something.


Seriously? Used pencils? I would be a rich woman if I could sell the used pencils in my classroom.

I almost bought this for Crissy. I think she would like it.

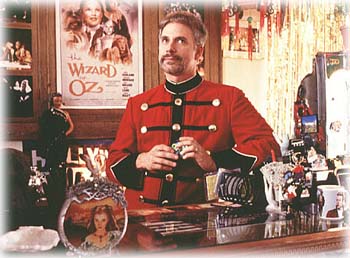
At the last shop I went to I ran into Corky St. Clair's twin:
He could not stop going on and on about how he loves antiques because it reminds him of the days of yore, and queens, and loveliness. OK, he may not have said all of those things, but he might as well have with all the ridiculous things he was going on about. I wanted to ask if he knew who Corky was, and if he modeled his life after him, but that seemed inappropriate.